How To Adjust An Air Rifle Scope
How To Adjust An Air Rifle Scope For Hunting
Air Gun shooting can be fun but it is baseless to shoot without hitting the target. Accuracy and precision are two of the most important things in Air riffle shooting. It is sheer carelessness to shoot aimlessly whether in hunting game or in target shooting. And you also have to know how to adjust air rifle scope and others need that need to be set up for perfect shooting. You will get the complete guide about setting of air rifle scope and rifle for hunting.
Also read our suggestion on choosing best air rifle scope and night vision rifle scope for detail idea.
To hit the target, it is very pertinent for the scope of the Air riffle to be adjusted to the required positioning. Here you find a step by step guide on how to get ready your air rifle and air rifle scope for hunting.
Way To Get Ready With Air Rifle and Scope For Hunting
Today, a plethora of Air Gun owners struggle with scope adjustment. Scope adjustment is quite simple and the procedure is stated in all the user manuals.
With this adjustment, the target will be enlarged and they users will be more vested with more ideas on how to handle Air Rifle. The cross hair is usually placed over the target for consistency and precise shooting. Adjustment of the air riffle scope is the key to accurate and precise shooting and must be achieved for better shooting result. Once the adjustment is done properly, the Air riffle can then be used for accurate shooting without much hassle. It is very pertinent for the scope to be sighted before every shooting. Adjustment of the scope is quite simple but technical in nature. It requires persistence and patience.
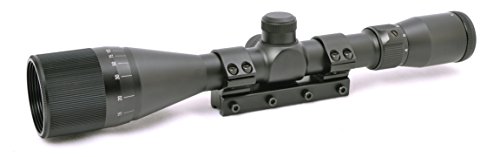
Best Selling Air Rifle Scopes Today

- Specification: 3-9x40
- Magnification: 3-9x
- Eye Relief: 3.5"
- Field of View: 25'-14' @ 100yds
- Exit pupil: 0.2"-0.67"
- FULLY ADJUSTABLE - Variable 3x-9x power and 40mm parallex adjustable objective. Fingertight windage/elevation adjustments.
- Focus as close as 5yards at lower magnifications
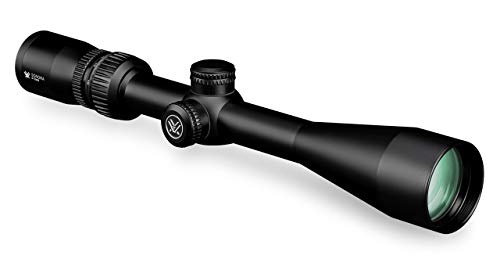
- The single piece, 1-inch, aircraft-grade aluminum tube offers a versatile blend of adjustment for a wide variety of applications.
- The Dead-Hold BDC is good for hunting at varying ranges where estimating hold-over is a concern. Fully multi-coated lenses increase light transmission with multiple anti-reflective coatings on all air-to-glass surfaces.
- The locking diopter eyepiece allows the user to set and lock the eyepiece setting once for their eye and forget it.
- The hard anodized finish provides a low-glare matte surface and helps camouflage position. O-ring sealed and nitrogen purged, the Sonora delivers water and fogproof performance. Rugged construction means this scope is shockproof.
- Backed by our unlimited, unconditional, lifetime, VIP Warranty. A fully transferable promise to repair or replace your item if it becomes damaged/defective. Does not cover loss, theft, deliberate damage or cosmetic damage that doesn't hinder performance.
Last update on 2024-10-21 / Ads
Many Air Guns come with scopes which users cannot see through. In this post, we shall highlight some of the basic steps and actions to take in the adjustment of Air rifle. Please read through the user manual before going ahead to read this guide.
Don’t be too close or too far from the eye piece
In most cases, viewers usually see small images with large scope surrounding them. This indicate that the eye piece is either too close or too far from the viewer. This anomaly can be solved by loosening the scopes embedded in the rings. The scope should be positioned such that the user can have a clear view of the image as it leaves the eye piece. A large and clear image will be seen by sliding the scope back and forth. The best image can then be selected. It should be very clear and large.
Place more focus on the scope
Placing more focus on the scope does not imply having a clear view of the image. It involves viewing the reticle clearly. In this case, the Eye piece and the adjustable objectives are adjusted to the ideal specifications. To achieve this, viewers should look steadily at a plain image and avoid distraction. The Eye piece of the scope rotates from left to right in a pattern similar to that of the binoculars. After focusing on the plain image for some time, the movement of the scope will be seen clearly by the viewer. This adjustment is not solely focused on the image. It is a way of simplifying the scope adjustment process. Users can easily adjust their scopes without the need for glasses if these techniques are well mastered.
Avoid parallax when adjusting
Shot ranges can be deduced using the coincidence range finder. It is common for viewers to easily see double image of the target on the screen. The images come together in quick contrast immediately the dial is turned. There is an ideal distance for the range. Through mechanical triangulation, the Range-finder can provide information about the distance the images must be moved in order to meet each other. The process is very simple. To avoid errors, a little technicality should be applied. Parallax is a very key factor. Users can easily miss their targets if they ignore parallax. Error due to parallax is eliminated by using a parallax ring to adjust the target into a sharp and clear focus.

adjustment of air rifle scope
Pertinent actions to take:
Achieving accuracy in Air riffle shooting involves some important steps and actions. These actions must always be replicated for consistent results.
- One of such actions is the setting up of the Bull’s Eye for a plethora of targets.
- A bull eye should be attached and assigned to each target. The shooter should be positioned at a point, 10 feet from the first target.
- Before firing the Gun, the scope of the Gun should be aimed at the Bull’s Eye and the user should master how to handle Air Rifle.
- You should be very careful about the point where the pellet aims to strike the target. The position should be situated at a point just below the Eye of the bull and it should be centered.
- The position may not be centered in some cases. In this case, you should carry out adjustment of the windage. Adjustment of the windage is done by making use of a flat-head screw driver to rotate the knob on the side footage of the scope.
- Majority of knobs are covered by plastics so users can easily unscrew and remove them.
- Simply rotate the knob in an anti-clockwise direction if the pellet point is situated on the left side of the bull’s eye.
- Turn the knob in a clockwise direction in cases where the point is situated on the right hand side of the bull’s eye.
- The ideal position of the shot is the center of the scope. It should be situated at a point equidistant with a point from the middle of the gun barrel to the scope’s centre. More so, it should hit at a point below the bull’s eye.
A quick illustration of the procedure goes thus:
- 1Check the top of the scope to ascertain whether it is too high or too low. With this, you would know how to carry out the adjustment of the elevation knob.
- 2Detach the plastic cover on the knob.
- 3Turn the knob in a clockwise direction if you wish to lower the shot.
- 4Turn the knob in an anti-clockwise direction of you wish to raise the shot.
- 5Proceed by cross-checking whether the scope is sighted at the ideal position which is 10 feet. You should aim to hit the bull-eye of the next target by releasing the trigger of the Gun.
- 6Take few steps to 10 yards away from target and release the trigger of the Gun while aiming to hit the bull’s-eye.
- 7Everything should be fine and the shot should land at a point which is slightly higher but below the bull-eye and centered.
Continue to fire more shots and ensure that you adjust the elevation until the pellets hit the midpoint of the bull’s-eye.
Windage and Elevation Adjustment
The elevation adjustment turret adjusts the height of your scope view and is found at the top, while windage impacts horizontal adjustments.
To sight the rifle, you must adjust two turrets. One turret adjusts elevation and one adjusts windage. The combination of these adjustments will give your shot an accurate destination every time!
Adjusting the scope to desired settings is a critical step before firing any projectile from a gun for hunting or shooting practice, but sighting in rifles can be tricky because it requires adjusting both crosshairs as well as distance between them which are represented by moving different parts on each side of the barrel: elevation and windage respectively; they control how high up (elevation) OR left-to-right (windage), shots go when fired at their intended target.
The turret adjustments are for adjusting the crosshairs and scope to your target. Sighting the rifle means placing it on center with a specific point, before firing off rounds.
Windage Adjustment:
The Windage is usually adjusted by turning the scope turret at the top. The more you turn, the more windage you get for either direction and move your point of impact accordingly. This will shift left or right depending on how much you’ve turned it–just remember that there’s a trade-off between adjusting windage up to shoot long range shots versus adjust down if moving targets are close because some people might not have enough time to change their settings!
The bullet’s trajectory is measured in MOA or MIL. Each click on your scope corresponds to the angle of 1/2 inch at 100 yards, so if you adjust by one half a degree then this would be around two inches left and right from where it was before adjusting. The only downside to having all measurements made up with these units is that they can become confusing when switching between reticles and adjustments because some will have their measurement system marked as either “MOA” or simply “MILS.”
The unit for measuring how much each adjustment changes the bullet’s direction are called clicks, which measure angles in Minute-of-Angles (or Minutes) but also expressed in length of distance per change applied.
The scope on your rifle will have a dial that tells you the process for adjusting windage. Windage adjustments are specified in MRAD or MOA at 100 yards, and they depend entirely on how many rotations you make with the turret.
The wind is always changing–sometimes it blows hard right into our face when we’re shooting up-wind; sometimes there’s not even enough breeze to rustle leaves from their moorings as we shoot down-range (which makes things pretty easy). Adjustments happen all of the time, but determining which adjustment does what can be tricky because every shooter thinks differently about these little nuances!
Elevation Adjustment
The elevation turret on the scope helps you measure and adjust your shots upward or downward to change where they hit. The mechanism for adjusting this is just like what we saw with windage, except it moves up and down instead of side-to-side. You can make adjustments by turning one way or another until the shot hits close enough to center.
So, The elevation turret on a scope is just like the windage, but it measures up and down instead of left to right. The more you adjust your rifle in either direction, the higher or lower your point-of-impact will be when you aim at something—no matter what that thing might be!
When you use a scope, it is important to know the markings on the elevation turret and how they correspond with your level of experience. There are three types of MOA adjustments that may be found in different scopes: ¼ inch per click, ½ an inch or 1 whole-inch clicks at 100 yards depending on what type of range setting one prefers. The most commonly used adjustment for recreational shooting is ¼ inches because it provides plenty accuracy while still being fairly fast when needed; just make sure not to get too close!
How to sight on a scope:
The meticulous adjustments that are required to make riflescopes accurate for different distances is a delicate process. The slightest discrepancy can have devastating consequences, so it’s important not only to be aware of the specific distance you’re shooting at but also adjust your turrets correctly beforehand in order to maximize accuracy and precision on target no matter what size animal you may hunt next.
The careful calibrations needed for rifle scopes varies based off the range being sighted-in or adjusted; this means one setting might work better than another depending on where exactly they need adjusting from (i.e., 50 yards vs 100). It takes time and patience when making these calculations because even slight discrepancies between two ranges.
How to do Parallax Adjustment
Parallax adjustment is a feature found in many high-end tactical scopes and has become increasingly popular with buyers. The parallax setting can be used to adjust the scope’s focus for more accurate shooting at long ranges, even though it does not eliminate bullet drop compensation or other factors outside of your line of sight when aiming.
A lot of scope manufacturers have started to include parallax adjustments in their products. These are particularly popular for long-range shooting, where accuracy is critical and the slightest error can be the difference between a hit or miss. Parallax adjustment turrets allow shooters to dial back the elevation from 100 yards out but this will vary depending on your specific model and needs as it may not need adjusting at all with some scopes!
The Parallax adjustment corrects errors with the focal plane in cases where the target image and reticle are on different focal planes. This becomes apparent when one places their eye close to the scope, moves it around a bit while looking through it at something that is not too far away, then brings themselves back to take another look after adjusting for parallax error by turning an adjustable screw near or above your head. The crosshair will now appear fixed even though you have moved well out of its range!
How Do Turrets Work?
Turrets are an important tool for accuracy but not every scope has one. Turret types vary so you should choose the best type to fit your needs and rifle’s specifications because it can affect how accurate they will be.
The use of turrets on a rifle scope is not universal. Different types serve different purposes and vary in size, shape, material type used for construction as well as the cost which again will depend upon the manufacturer’s preferences and even country origin.
The primary purpose of turrets is to set up the zero for your rifle’s scope. The process of zeroing involves adjusting your scope’s reticle up, down, forward and backward until it fully aligns with where the bullets hit at point-blank range on a target. If you find that shots are hitting lower than what they should be after following these adjustments then move them higher as necessary!
Target turrets have been in use for a very long time and gained their name from the gunners who love to practice target shooting. When shooters need that extra precision, they take aim with these small adjustments made by turret dials which make it easier than ever before to hit dead center on your targets.
Target turret scopes are used to make minute adjustments for perfect accuracy. They differ from more traditional types of rifle scope in that they have a small adjustment scale and require very precise measurements to work properly, which is not ideal when hunting or shooting recreationally with your friends because any bumping will cause them to be off target.
Target turrets can only achieve true precision if you’re willing take the time necessary – even just one millimeter makes an enormous difference!
Ballistic Turrets
Ballistic turrets are the preferred choice for hunters and field shooters who need to aim and shoot targets quickly without making small, precise changes. Ballistic turret adjustments can be made per click which makes them a quicker option than target turrets when it comes time to take down game .
Ballistic turrets are capped so that they don’t accidentally change while on the move. These raised, marked-off cannons make it easy to know where you’re shooting at and how far away from your target you need to be in order for them not get a hit back.
Latest posts by Albert Smith (see all)
- Gamo Varmint Air Rifle .177 Cal Review - June 30, 2023
- Sig Sauer Virtus .22 Cal PCP Air Rifle with 3-9×40 Riflescope Review - June 24, 2023
- Barra Airguns Sportsman 900 Air Rifle Review - May 21, 2023